| History | |
Everest in England 1825-1830
|
|
||||||||||
| For anyone serving in India during the 19th and early 20th century life was obviously very fraught with sickness problems. Essentially if the sickness was not too bad you were sent to South Africa to recuperate but if it was serious then it was likely that you could obtain home sick leave. This is what happened to Everest who was so affected by fevers and the after effects that he was away from India for five years. By any criteria that is a long period for recuperation and in fact after the first few years his masters insisted that he be back in India within the five years.
As with when he was in South Africa he was not idle. Whenever his health allowed he was working on activities related to the Great Trigonometrical Survey. Within a year of leaving India he was nominated to become a Fellow of the Royal Society. This was, and still is, one of the most prestigious memberships that a scientist could achieve. Interestingly at the time of the award Everest had achieved little compared with that which was to come later. His time was particularly spent in two areas – the compilation of a Report on all that had so far been achieved on the Great Survey and secondly on the design and purchase of new instrumentation [2]. This latter allowed him to take back to India on his return equipment that was at the cutting edge of technology at that time. His Report [1] published in 1830 was a major scientific work and to both compile it and get the printed copies available by the time of his return was a massive achievement. From the work already done on the survey he was able to make comparisons between three sections of the India arc with nine other arcs to determine values of his own for the earth parameters. These became known as Everest’s First, or 1830, Figure of the Earth.
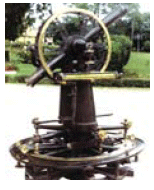
To ensure that he was aware of all the latest instrumentation he spent much of 1828 travelling around Europe including Rome, Venice and Vienna and almost certainly taking the opportunities to visit all the instrument makers. As a capable mechanical engineer he would have been seeking ideas and these he took back to English makers where he had a small theodolite made to his own design. This was unusual in having just two part circles rather than a whole one in the vertical plane. As the instrument was aimed at use in revenue survey work his attitude was that only relatively low elevation angles were required so why have a full circle. In 1829 Everest went to Ireland to meet Col. Thomas Colby who in 1827 had been involved in the measurement of the Lough Foyle baseline of some 41 000 ft length. (12.5 km). In addition to showing a keen interest in the theodolites of various sizes he was particularly keen to know all about the bar equipment that Colby had used for the measurement. This was what came to be known as the Colby compensating bar. There were six bars each of about 10 feet in length in a set and Everest managed to obtain a set. To test them out before returning to India he arranged to use Lords Cricket Ground in London and to practice over a line of 567 feet length where his out and back measures agreed to 3/40 inch (1:90 700). Each unit consisted of a bar of brass and another of iron so arranged and joined together to compensate for any expansion due to temperature changes. This was ingeniously achieved by use of the fact that the two coefficients of expansion differed in the ratio of 2 to 3. The whole was placed on rollers in a long wooden box. [2] Consider the time it took Everest on the first baseline he measured using the equipment – i.e. from 5 November 1831 to 28 January 1832 for 33960 ft – with the time required today to measure a similar line to the same accuracy. For that length the 10 ft bars would have been set on tripods, levelled up and readings taken almost 3400 times. On 8 June 1830 Everest sailed for India with a wide range of new instrumentation and would have had an even wider range if there had been any person on his staff capable of using pendulum equipment.
References1. Everest, G., 1830. An Account of the Measurement of an Arc of the Meridian Between Parallels of 18º 3 ‘ and 24º 7 ‘ Parbury Allen & Co. London. 2. Everest, G., 1835. On the compensation measuring apparatus of the GTS in India. Asiatic Researches. Vol. 18. pp. 189-215
|
||||||||||



 (4 votes, average: 4.75 out of 5)